

How to Create Double Eyelids with Makeup
Hi everyone! Please welcome Dionne Co, our guest blogger for the day. She blogs at Hello Beauty, so please do visit her and say hello! She's a true-blue makeup addict if I ever saw one. You'll love her tips, I'm sure.
Back in my high school, almost 99% of the students were Chinese. A lot of my classmates complained about not having double eyelids (we used to call it “ting sun” or “fold”) so you’d see some teenage girls walking around with scotch tape on their lids! It was pretty funny to look at but wishing for double lids was, is, and always will be a common occurrence among Oriental girls.
Although I don’t really have anything against surgery, it’s still pretty painful, expensive and risky. Not everyone’s willing to go under the knife. Today, I’m going to show you how to create that double lid effect with something inexpensive, safe and accessible – makeup!
The trick here is depth and dimension.
Read the complete step-by-step tutorial on how to create a double eyelid look after the jump!
NOTE: I won’t be doing the step by step guide for the base makeup. Only the eye makeup this time! (and no circle lenses or double eyelid tapes were used.)

Step 1: Gather all the products you’ll need. For this look, you’ll need
- Eyeshadow Base Color
- Matte Black Eyeshadow
- Matte Brown Eyeshadow
- A light shimmering color for accent (I used a shimmery peach-apricot color)
- False eyelashes
- Black liquid liner
- White pencil eyeliner
- Powder highlighter (try not to use liquid highlighters like High Beam for this one!)
- Eye makeup brushes – A FLUFFY/BLENDING BRUSH IS THE MOST CRUCIAL BRUSH FOR THIS LOOK!

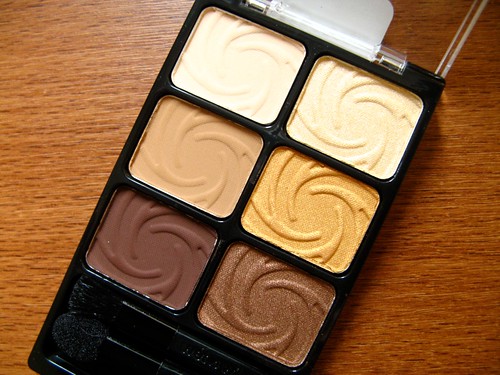
Editor's note: if you don't have the Naked palette, a much cheaper alternative is the Wet n' Wild Color Icon Eyeshadow Palette in Vanity. It's only P500 but you can achieve the same effect as demonstrated in this look.
Step 2: Apply your base eyeshadow color all over the lids. I’m using MAC in Ricepaper – my favorite base eyeshadow!


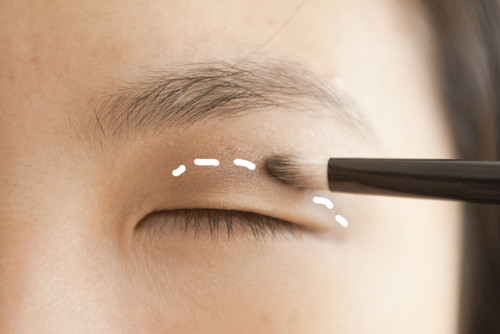
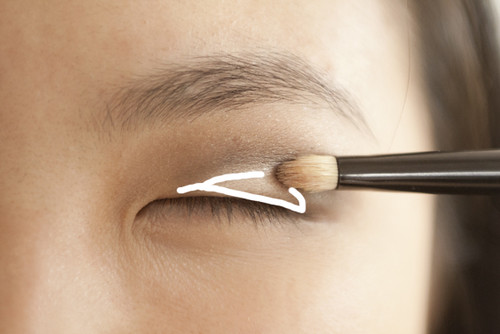
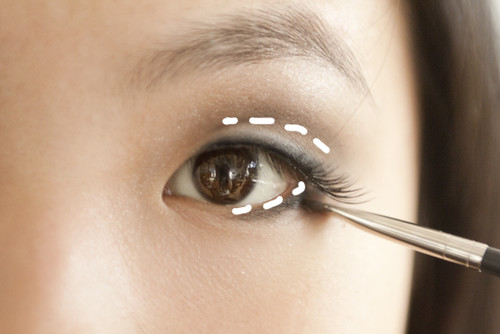
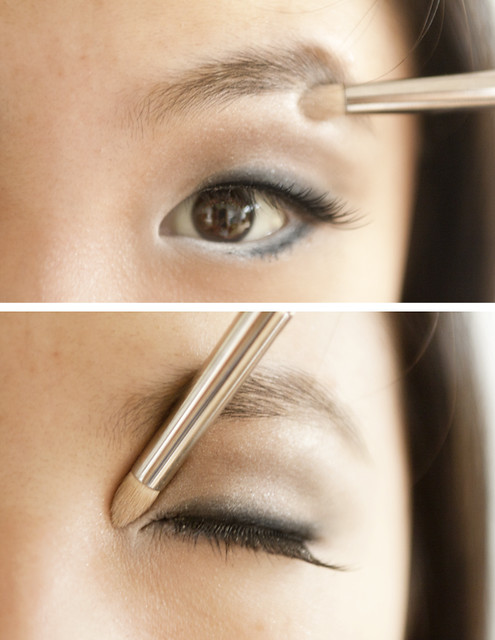
Step 3: Using an angled shading brush, apply the matte brown eyeshadow along where the fold of the lid is supposed to be (dotted with white outline). I’m using Shu Uemura Eyeshadow in M Brown 895 and a Charm Pro angled shading brush.

(right-most color!)
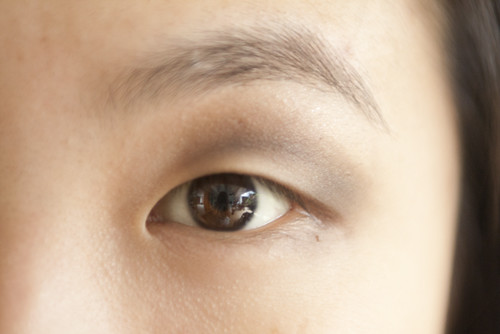
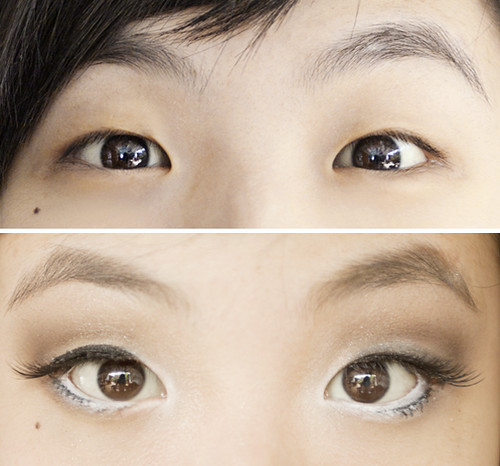
How it should look like - A fold!
SO FAR THIS IS HOW YOUR EYES SHOULD LOOK LIKE:
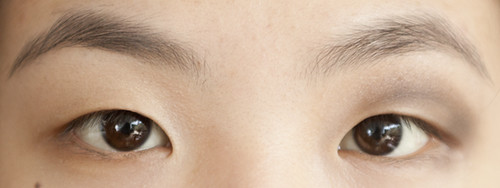
Step 3: Apply a light shimmering color all over the ball of your eye, below the area where you put the matte brown eyeshadow. Applying a lighter color on this area would give your eyes more dimension. I’m using Bootycall from the Urban Decay Naked 2 Palette.

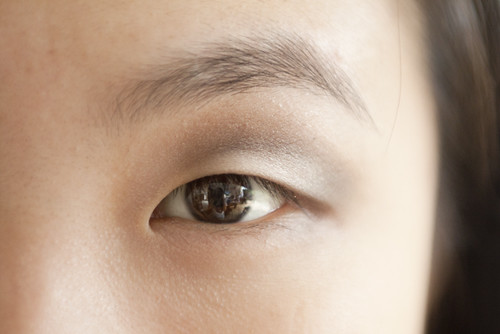
How it should look like after applying light shimmering color and blending
Step 4: Give your eye some definition by lining your eyes with matte black eyeshadow. Try to use eyeshadow for this one and not eyeliner because it’ll be easier to blend for creating a more natural look. I’m using Shu Uemura M Black 990 and a MAC 208 brush.


Double wing is optional! heehee...
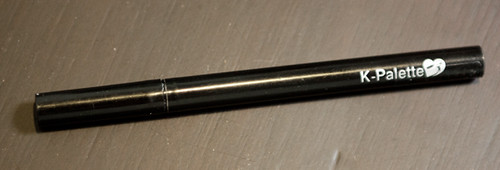
Step 5: Apply falsies and then outline the edges of the lashes with a black liquid eyeliner. It’s up to you whether you want to use natural looking falsies or diva-esque ones lol! Here I’m using Japanese Fairy Lashes and the K-Palette Super Black liquid liner.

——-
Step 6: Using the matte black eyeshadow, line the area below your eye from the outer most corner to the middle. And then, redefine the “lid” you made (using the matte brown eyeshadow) by outlining it with the matte black eyeshadow as well. Remember to BLEND a lot!
——-
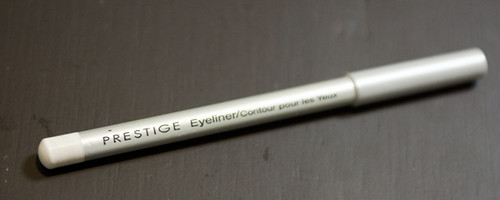
Step 7: With your white pencil eyeliner, shade the inner corners of your eye. Then line your entire bottom waterline to give the illusion of bigger eyes. I’m using a Prestige Pencil Eyeliner in White.

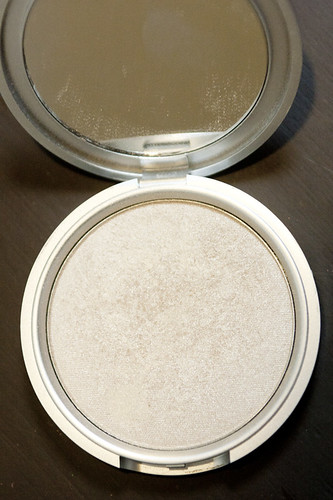
Step 8: Highlight your brow bone and the inner corners of your eye using a champagne colored powder highlighter. This will emphasize the darker areas of the eye which would give you eyes that look deep set. I’m using my favorite The Balm Mary Lou-minizer and a MAC 219 brush. (the reason why you should avoid liquid highlighters for this is because the consistency of the liquid highlighter might make the colors you’ve applied run! Save the liquid highlighters for the cheeks/nose area )
Step 9: Redefine your brows! I’m using a Shu Uemura Hard Eyebrow Pencil in Walnut Brown.

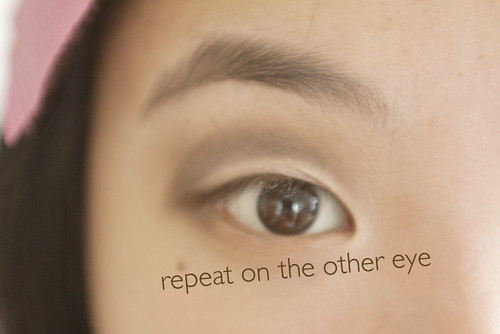
Step 10: Repeat steps 2-9 on your other eye
And you get:
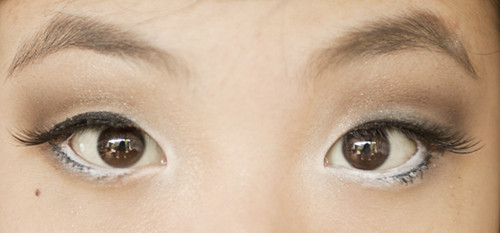
Ta-da!
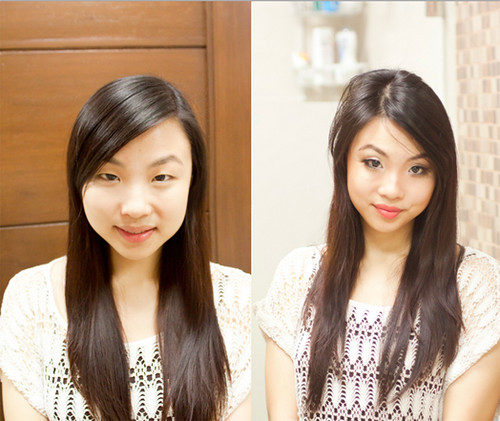
Of course it’s not as drastic as say, getting a double eyelid surgery, wearing circle lenses or using a double eyelid tape. But for girls who want the double eyelid look without the discomfort, this tutorial is for you!