

5 Things You Need To Know About Your Liquid Liner Before F-ing With It
If there’s anything about makeup that terrifies the heck out of me, it would be liquid liners. As my squad's resident kikay, I can no longer count the number of times I’ve squirmed from being asked to do someone’s cat eye. It’s hard enough to do on my own eyes!
Liquid liners are intimidating because they have to be applied with precision. Unlike pencil liners that I can artfully smudge into a smoky eye look if I make a mistake, there’s no saving a poorly-applied liquid liner without help from some makeup remover or a dab of concealer. So why bother with it at all? Well, it has the sleekest finish among the different liner formulas because the ink is thin but intensely pigmented. It also doesn't tug on the lids unlike most pencils. Plus, if you master using either the pen-type or dip-brush liquid liner, you can line your eyes faster and without needing to tote along a brush applicator.
You’ll need plenty of practice before being able to wing its application (pun totally intended) but it’s totally worth it! So if you’re planning to swap your gel or pencil liners for this inky version, here are five things you should consider before making that first stroke.
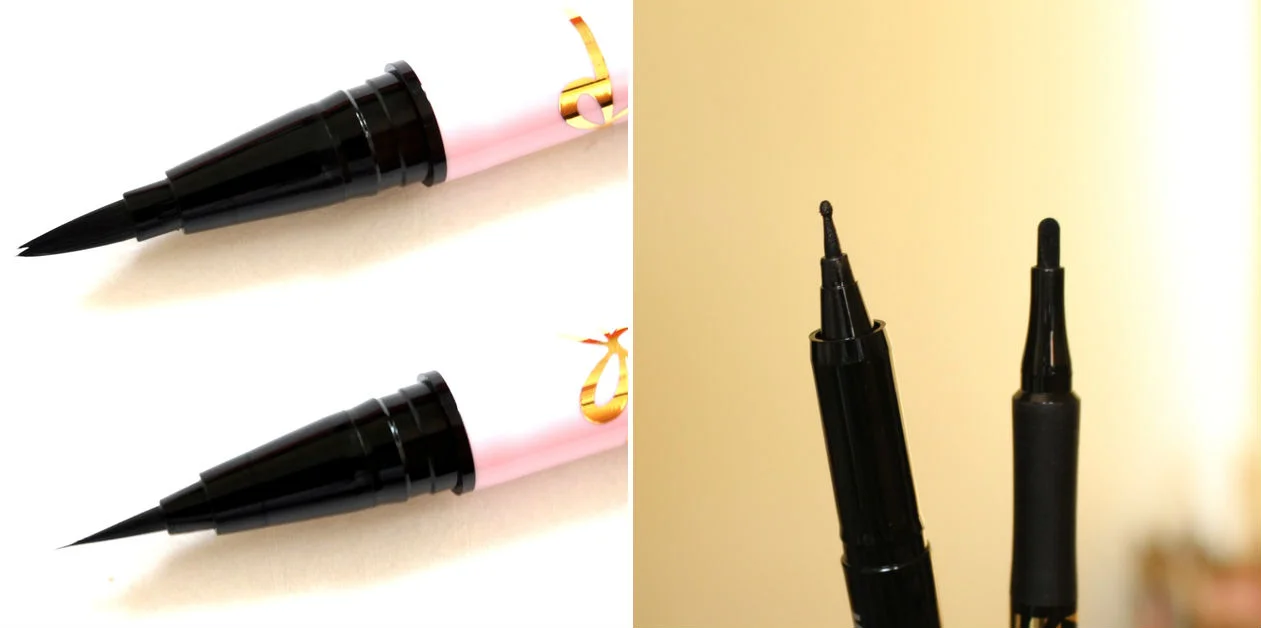
#1 Need-to-know: The tip matters
There are two types of liquid liner tips: the felt tip that resembles a Sharpie, and the fiber brush tip, similar to a calligraphy brush. Felt tips are recommended for beginners, since they’re stiffer and thus easier to control - it's the most similar to the pens we use for writing. Most felt-tip liners feature a pointy end but some brands offer a thicker tip or a novel shape that supposedly makes lining your eyes easier.
On the other hand, brush tips are more flexible and make it easier to follow the shape of your lids as you draw your line. You have a lot more control with regards to the line thickness and shape you want! You’ll need very steady hands and lots of practice to master this application but it’s the best option for making an invisible line.
Which is better? It comes down to preference and how good your eyeliner is. Generally, felt tips are great if you're just starting out while brush tips would be recommended for more advanced liner mavens.
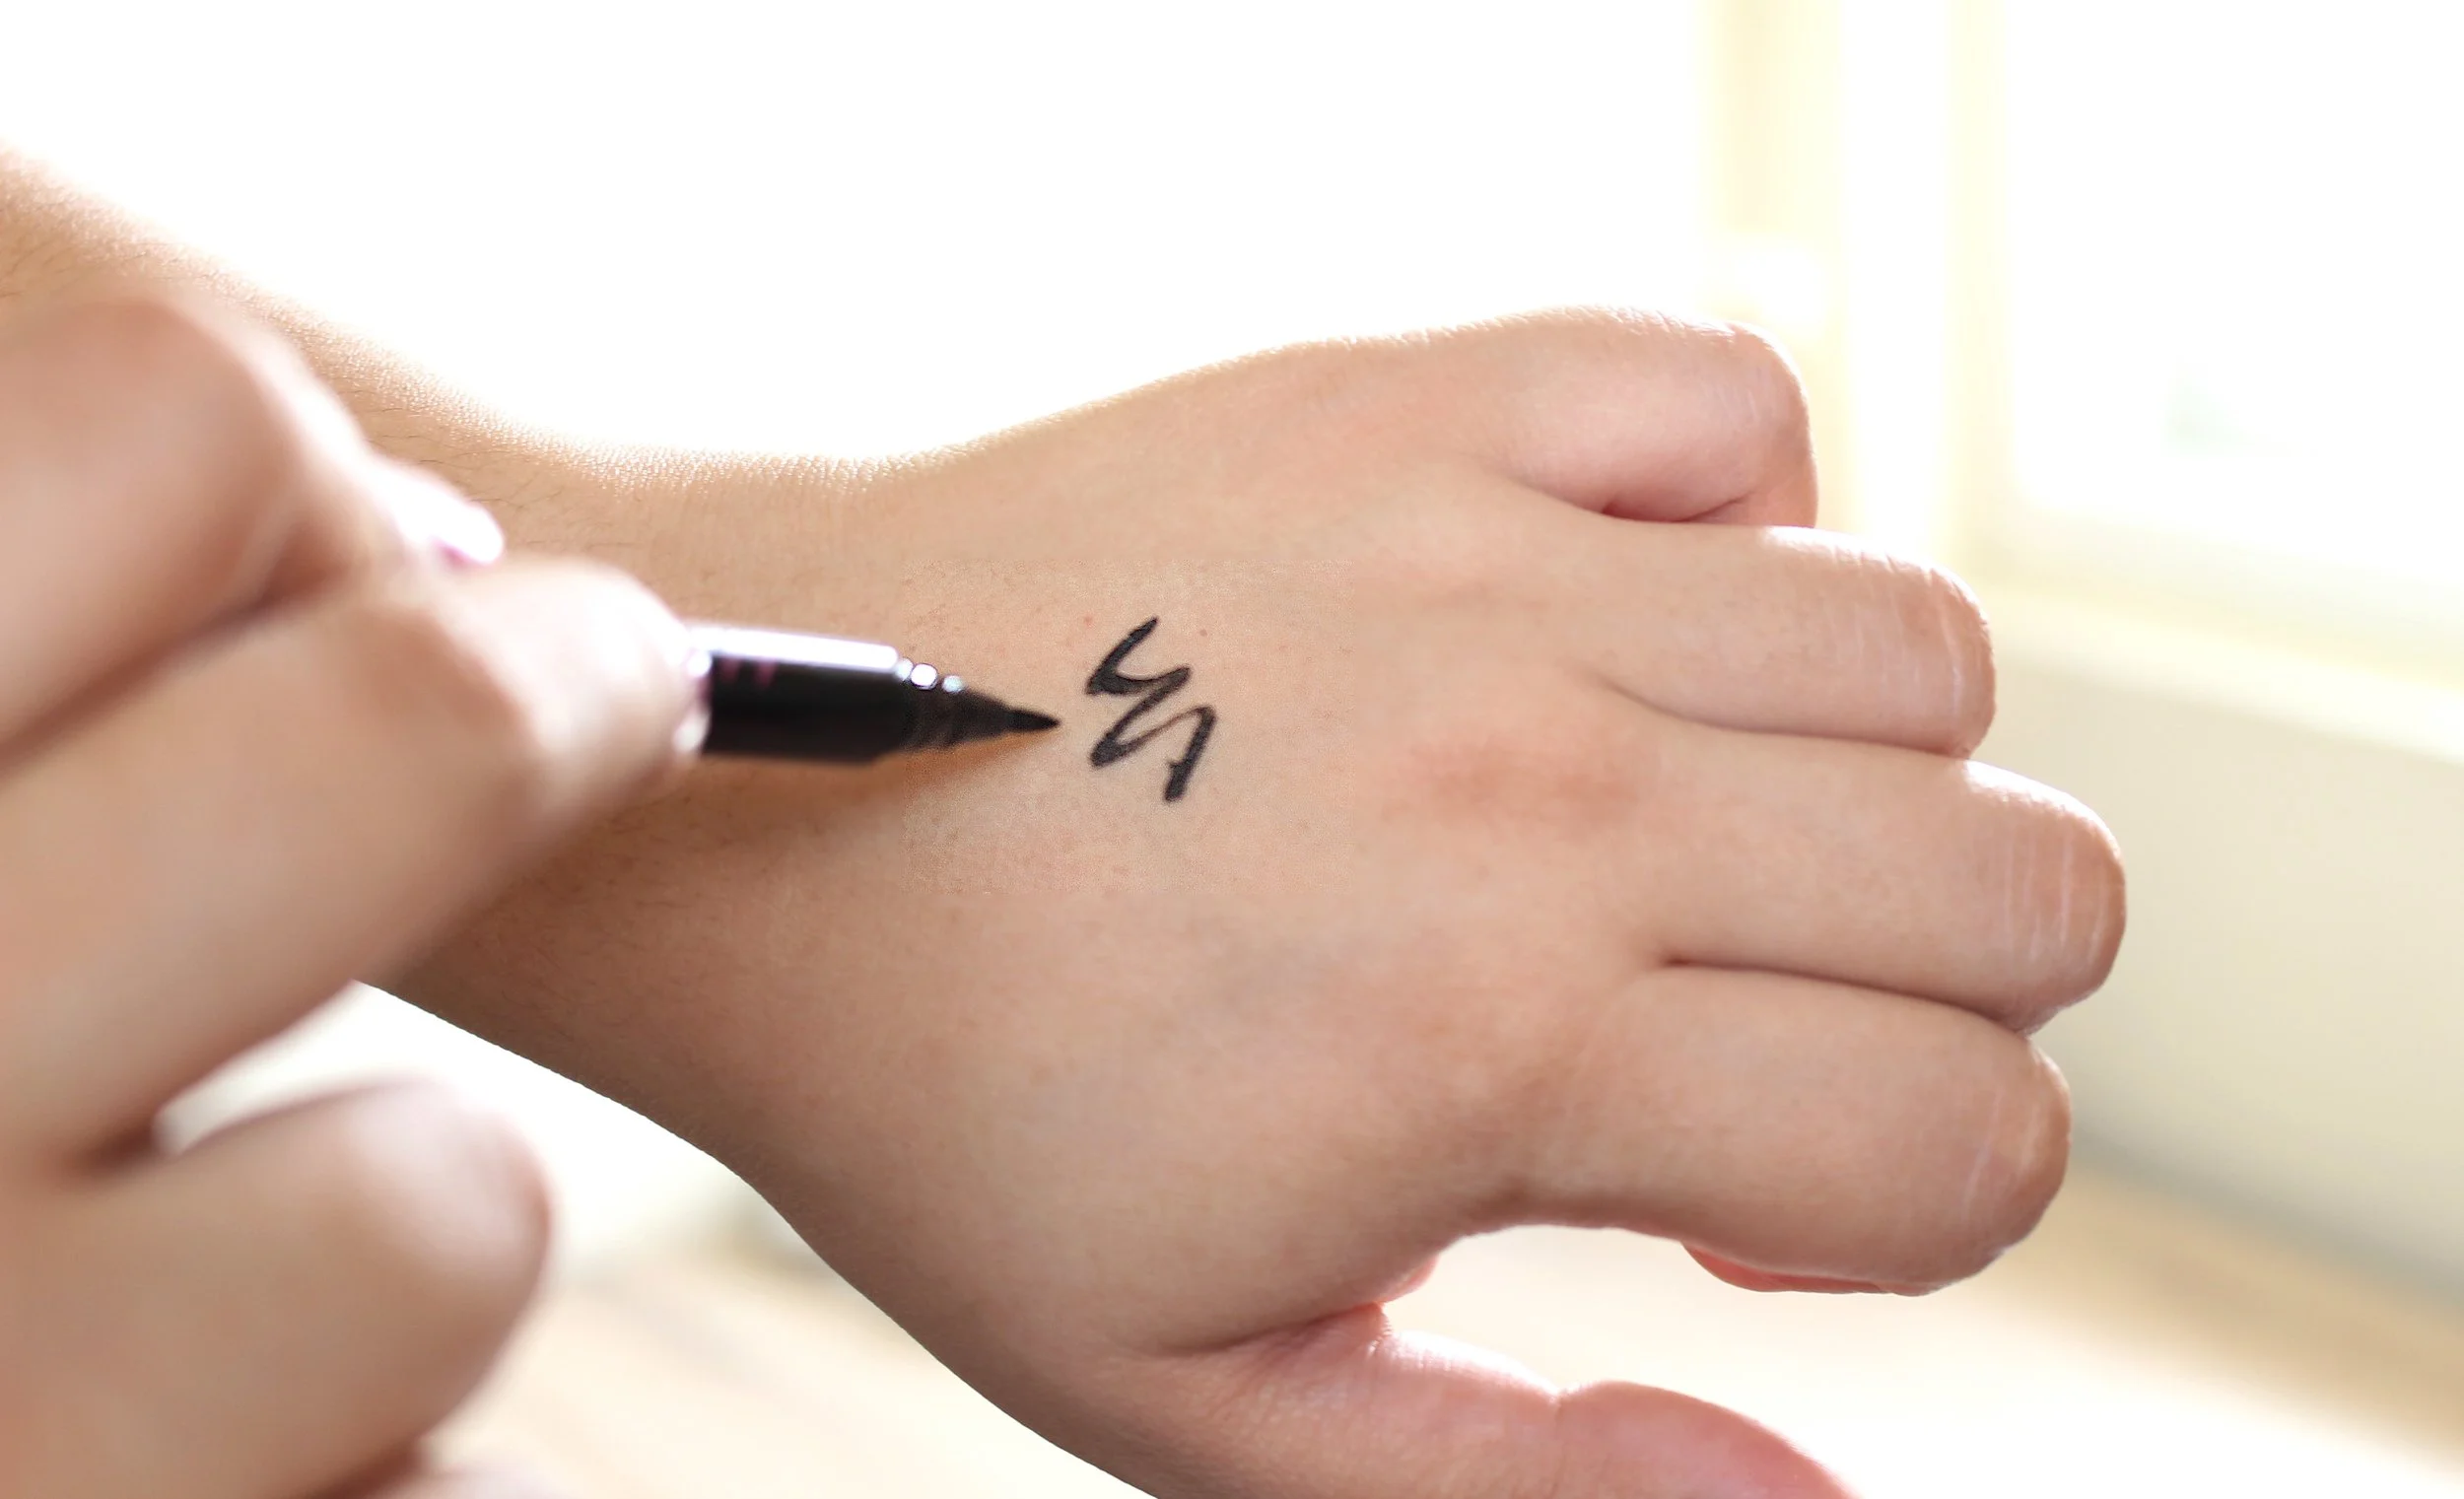
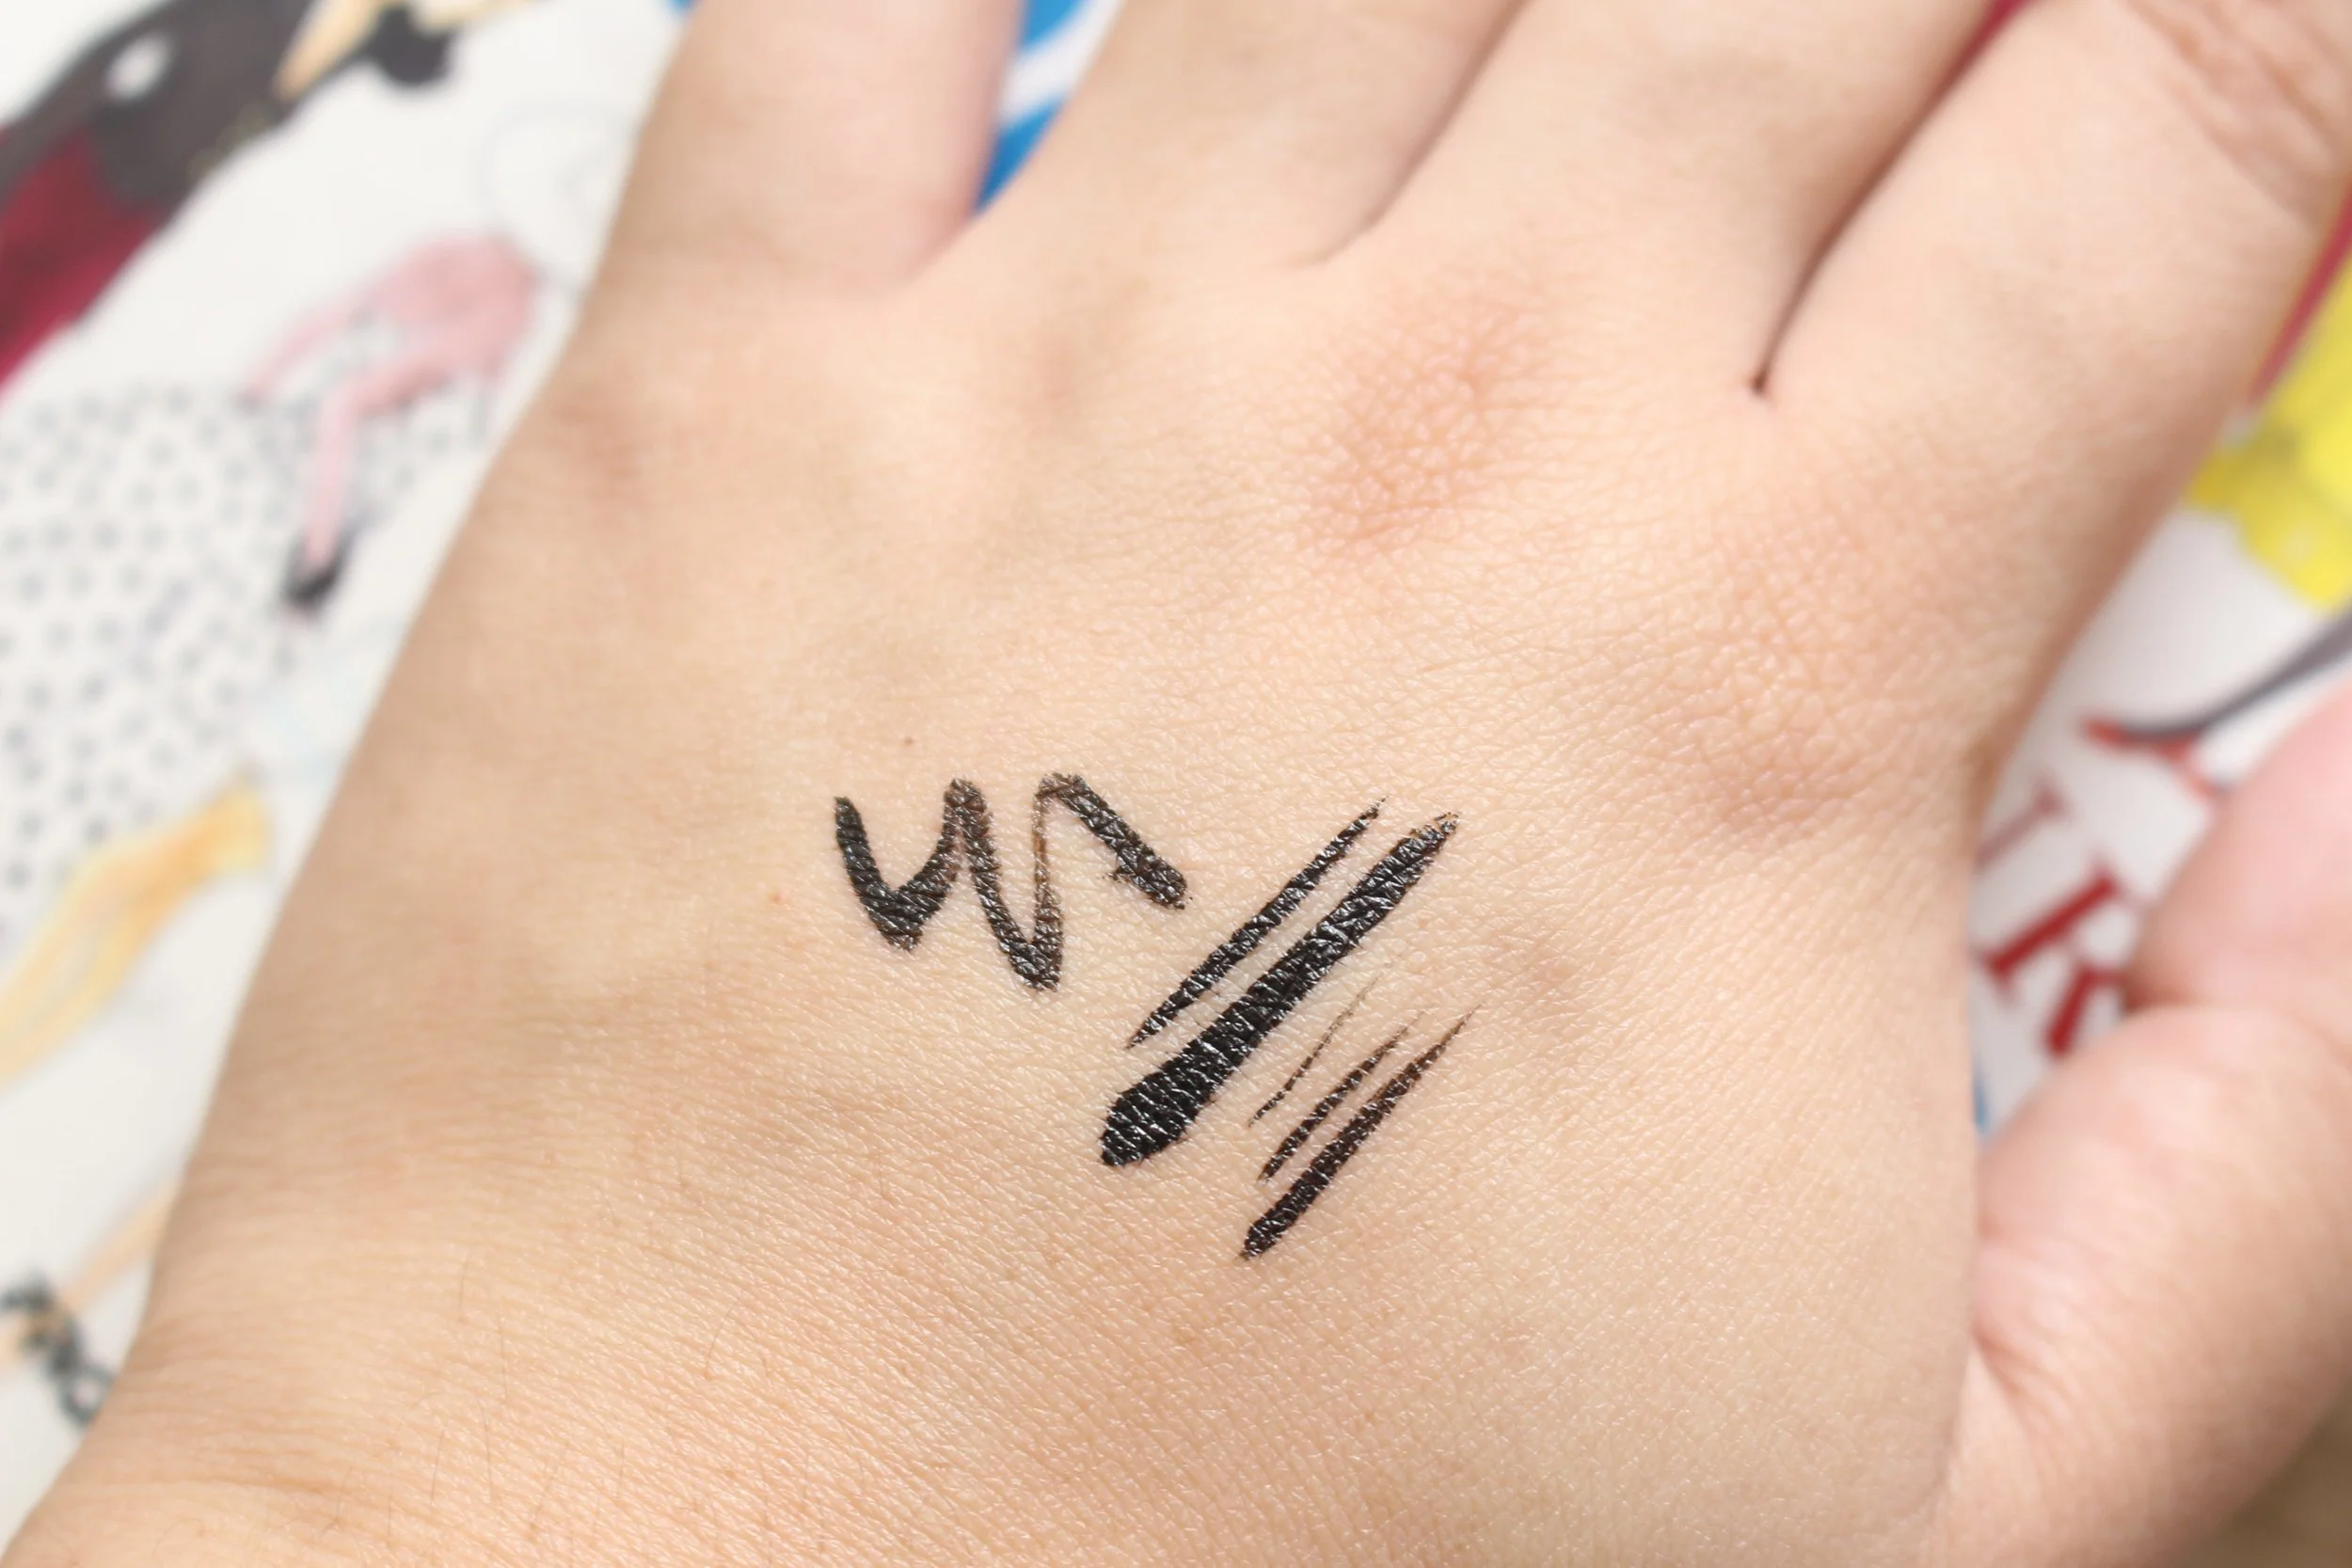
#2 Need-To-Know: Always test for performance before actually starting to line
Before putting eyeliner on your lids, ALWAYS swatch it on the back of your hand or wrist to check the formula. How wet is it? How solid is the pigmentation? Did the fluid and pigment separate (i.e. do you need to shake it first)? This information will guide you in how to proceed with lining.
Swatching the liner before every use will also remove the excess product from the brush, so that you don’t end up with a too-thick application that can spread all over your eye. If it feels too watery, try lining your eyes first with a dark eyeshadow before putting on your liquid liner. This gives the liner something more to adhere to, and improves the longevity and pigmentation of the liquid product.
#3 Need-To-Know: Mind that pressure
Different liquid liner tips and formulas require a different amount of pressure. Yes, I know - it's so confusing! But you'll get a feel for it eventually. Some products require a heavy hand to actually get a solid line; others, just a gentle touch. If you have a lot of eyeliner muscle control (yes we just invented the phrase!) then go for a brush. If you can't help but press in, use a felt tip.
Here's some pro advice: whilst lining, rest your elbow on a stable surface to keep your hand steady. Having your elbow supported eases your application pressure since the weight of your arm and hand is propped elsewhere, plus your hand is less likely to shake and create crooked lines.

#4 Need-To-Know: Layer up to get intense
Intensity of color and precision are what make liquid liners swoon-worthy but sometimes, you end up with a product that doesn’t have the stark black pigmentation that you want. The secret? Layer.
You can opt to line your eyes with a pencil liner, eye shadow, or gel liner first so the payoff would be darker and neater because of your base outline. Then you can add your liquid liner to darken and create a finer line. This is how Adele's makeup artist does her iconic cat eyes! But if your liquid liner is buildable, you can choose to line your eyes multiple times, letting it dry for a few seconds between layers to avoid flaking. Continue to apply until you get the depth of color that you’re after.
#5 Need-To-Know: Sorry, the short cut doesn't exist
When I first started using liquid liners, I was convinced there was some trick that every liquid liner expert has been hiding from the rest of the world. But, alas, there isn’t. And I realized soon enough that no old business card or Scotch tape will trump practice. These hacks may help but it feels like a great achievement to be able to line your eyes on your own.
Stock up on your favorite makeup remover and practice lining your eyes even if you’re just staying home. Start with liners that are affordable but offer great quality so you don’t get frustrated by poor brushes and flaky formulas. It requires patience (a lot of it), a trusty product, and an unswayable determination to get perfectly-lined peepers.
Discussion time!
- Have you switched to liquid liners?
- What products do you rely on to make your wings even?
- Any tips for beginners?