

How to apply eyeliner like a boss (plus a stub on drawing a mean cat eye)
Whoever invented eyeliner has bestowed womankind a great gift. From the ancient Egyptians, to its rise in the 1920s flapper era, to today's modern woman, eyeliner has served us remarkably well by opening and enhancing our eyes. A simple black line can do wonders for our face - provided it's applied correctly, of course.
Eyeliner can be difficult to use in the beginning, but trust me, practice is the best way to get your perfect line. Why when I started using it in my teens, I was such a klutz! I couldn't get an even line for all I was worth. I just kept repeating and repeating though until my wobbly line became straight and fine.

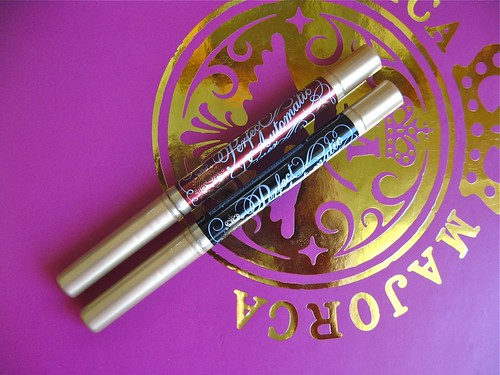
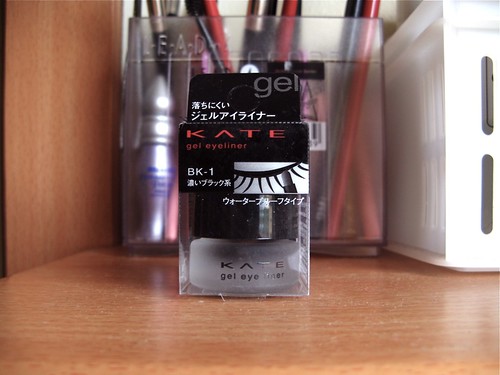
Tools: Charm Vegan Pointed Eyeliner Brush and Kanebo Kate Gel Eyeliner
Now, there's no one true way to apply eyeliner. The techniques I'll be sharing here is what I prefer to do with my own eyes, so feel free to experiment and find a method that works best for you. I used a gel eyeliner and a pencil brush for this tutorial but the principle is still the same for pencil, powder, and liquid liners.
Ready? Here goes!
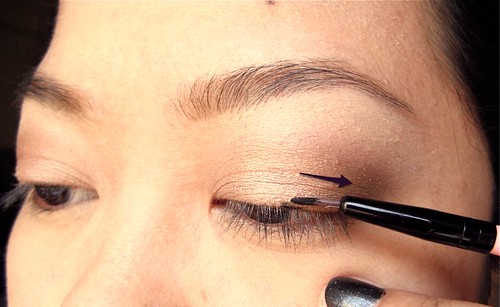
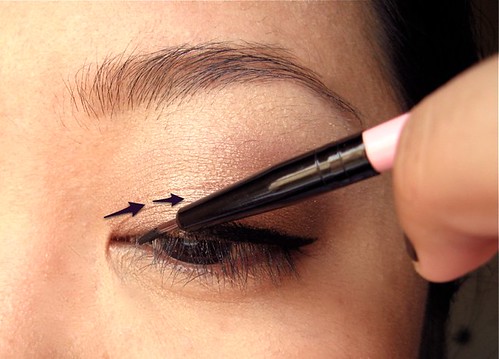
Step 1: Start in the middle of your lash line, then draw outwards. Make sure your brush is loaded with just enough product so you don't smear black all over your lids. It's okay if the line is not immediately perfect, since you can go back later to correct it.
Tip: To keep your hands steady, you can rest two fingers on your cheekbones! Don't blink if you can help it; the quicker you draw the line, the less wobbly it will be.
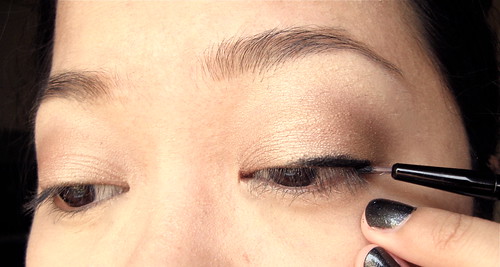
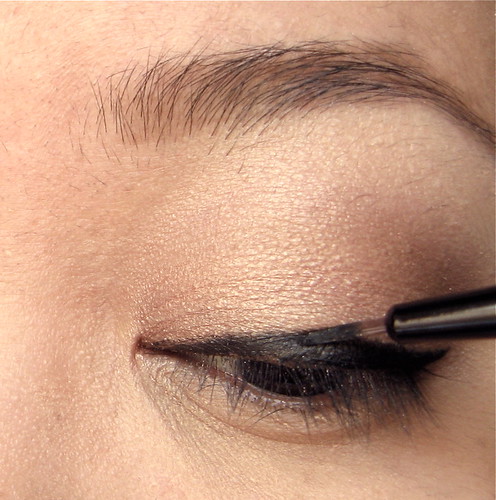
Step 2: Stop the line at the outer corner of your eyes. Now, you can subtly wing it up from that point.
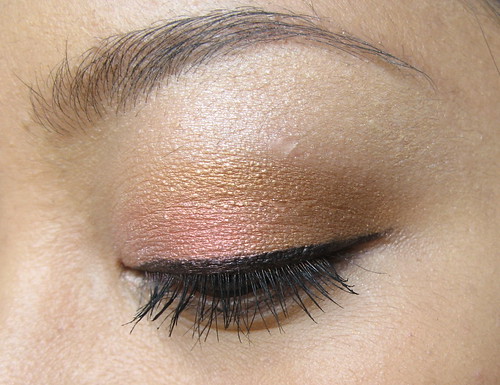
The shape I like best for my eyes (and my guess is, it looks good for all eye shapes) is the almond shape. It's usually thicker in the middle, thins a bit as it goes outwards, then has a slight flick up at the end.
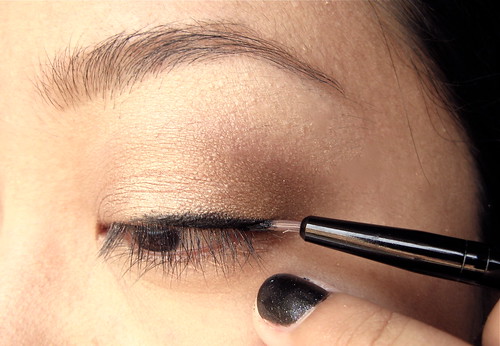
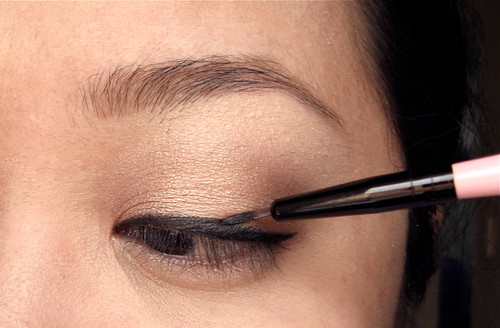
Step 3: From the inner corner of your eyes, connect the line to the middle part. This line has to be thin, because you're trying to mimic your lashes being thicker at the outer fringes of your eyes. If your eyeliner is too thick here, it may look too fake and obvious.
If the latter part of your line looks wobbly or if you just want a really sharp look, draw over the edges of the line in one straight stroke.
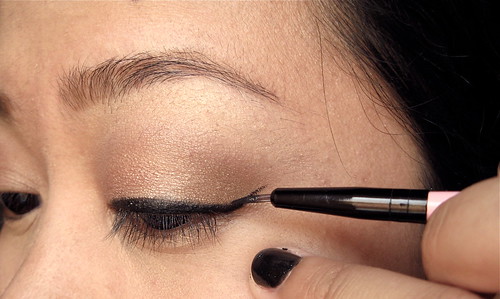
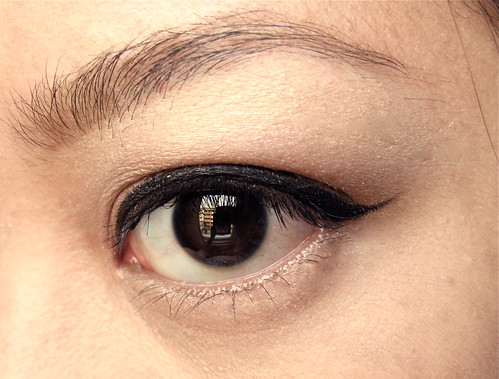
And that's it! Super easy, really. It just takes practice. From this basic line, you can thicken or extend it as you like. Here's a short tutorial on making a cat eye:
Step 1: Extend your eyeliner from its edge, going up. Your "guide line" for this is the slope of your lower lid, like so.
Step 2: Once you have your long flick, draw a small triangle from the base of your line.
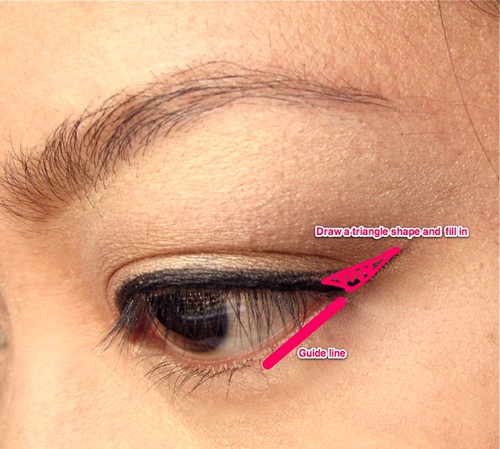
like so:
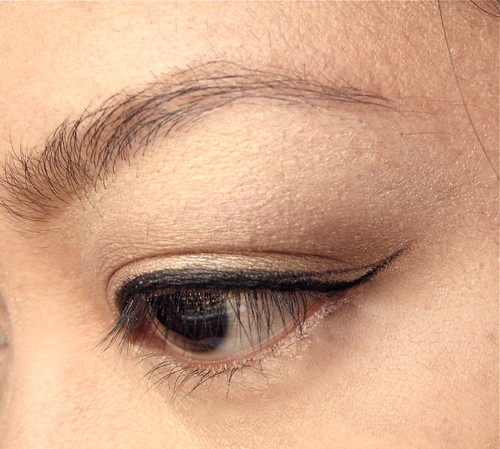
Step 3: Fill the triangle in. You can make the cat eye more exaggerated if you wish - this is just a general idea of how to do it.
And that's it. :) Again, easy after a bit of practice. Before I leave, here are some more practical tips on eyeliner application:
- To prevent your eyeliner from smudging, use it on top of a power and/or primer base. You can also set it with a similarly colored powder. It's the same principle as drying ink quickly by dusting it with sand.
- ...If your eyeliner still smudges after all this hoo-ha, then you are using a crappy eyeliner. Replace it. Here are some of my top five eyeliners.
- ....If the eyeliner still smudges, then perhaps your lids are just too oily. I suggest you pile on a water- and oil-proof mascara instead, to get the illusion of a line.
- Should you do a thin line or thick line? Depends on what you like! There are no hard and fast rules when it comes to eyeliner shapes and sizes. Just wear what looks best on you or, if your look requires a certain eyeliner style, then do that.
And that's it! Hope this helps. :) Let me know if you still have questions and I will try to answer them.