

In Photos: The Miss Universe does a tutorial on how to do pageant makeup
Pia Alonzo-Wurtzbach is our favorite Miss Universe, but it's not just because she won in our lifetime and made all Filipinos proud. Her beauty and grace are, frankly, just the the cream on top of her intelligence, sense of humor, and empowering attitude. We love her story of trying for the Miss U crown several times; she's obviously a hard worker who has studied her trade. She inspires us everyday and we're always waiting to see what she's up to next!

Some of you may know that Pia actually did her own makeup the night she won her crown. She also usually does her own face even for more casual functions, and she even previously shared a video on her everyday makeup look! Earlier this week, she came out with a new video on how she puts on her pageant makeup. Okay, so we’ll probably never get to sashay in a pageant but we do face the same harsh lighting and camera flashes in special events. Want to follow along? We have the step-by-step tutorial from none other than the most beautiful woman in the universe herself!
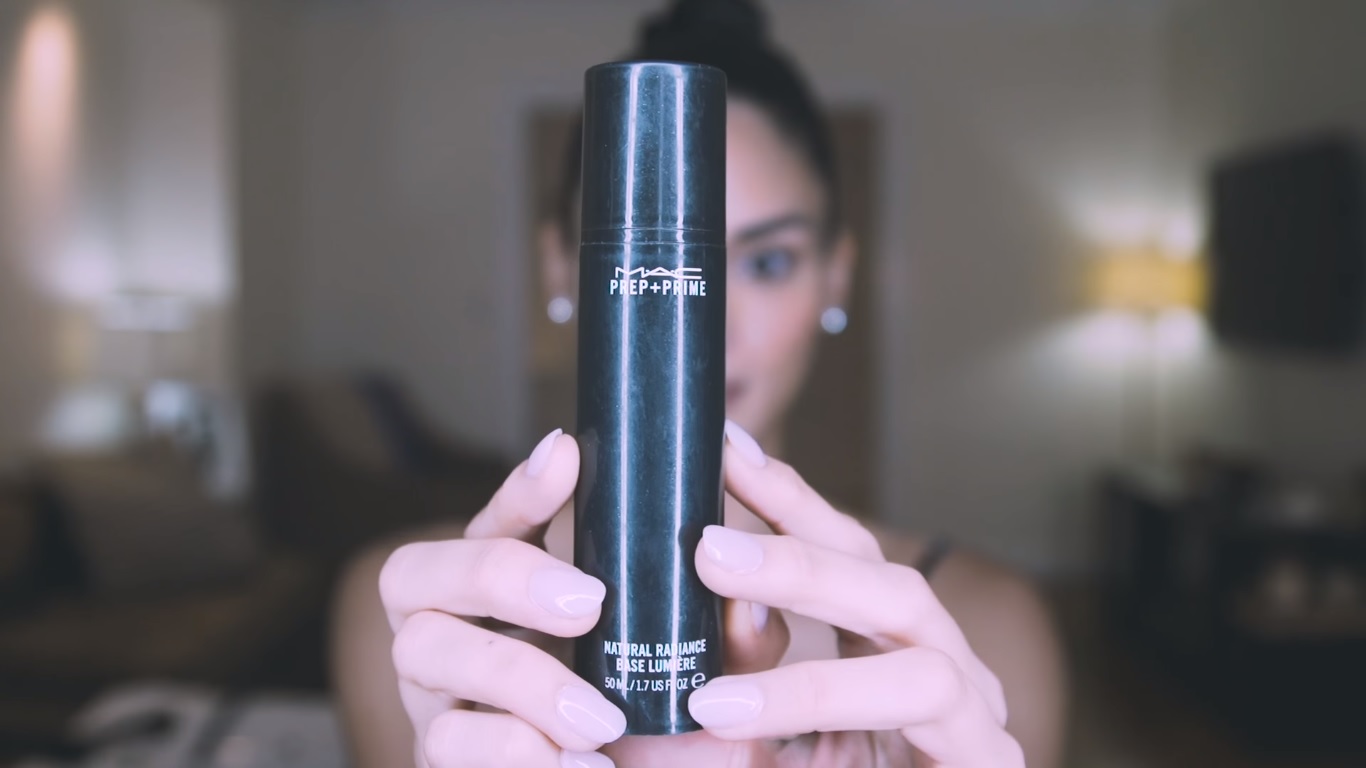
Pia sets up the base for longer lasting makeup with MAC Prep + Prime Natural Radiance. She uses her fingers to apply it all over her face.

She proceeds to apply the Diorskin Forever Flawless Perfection Fusion Wear Makeup using two different foundation brushes: a rounded one for tight areas like under the eyes and around the nose, and a flat brush to fill in the rest of her face. Here's a beauty queen pro tip: for stage makeup, go for a foundation that’s one shade darker to prevent the spotlights from making skin look washed out.

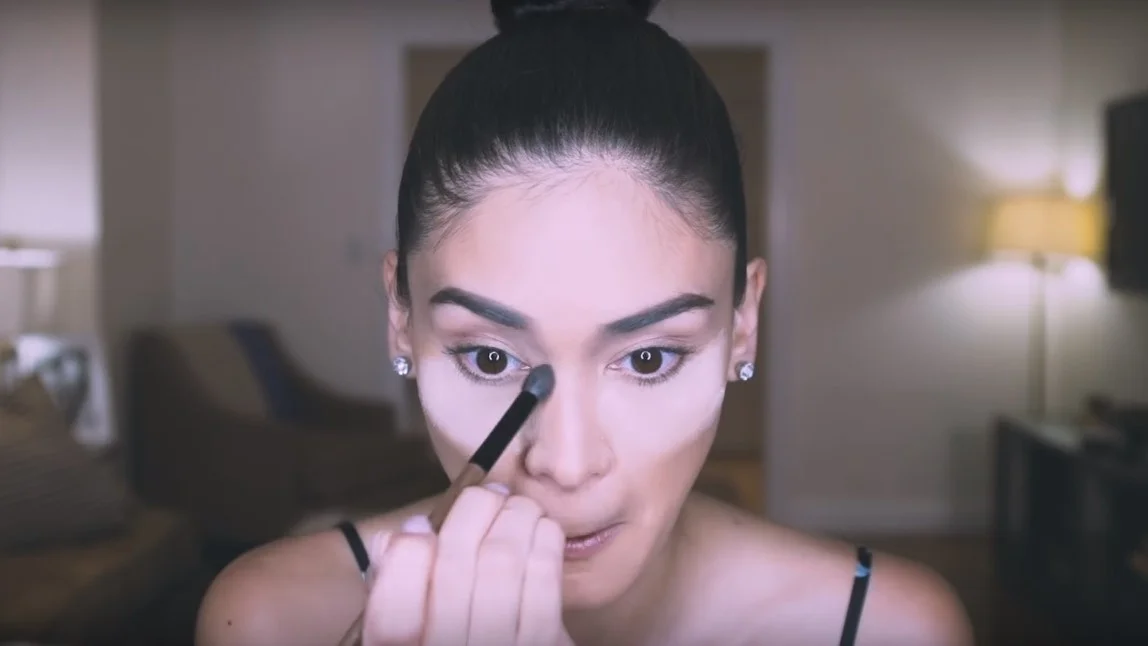
Using the Laura Mercier Translucent Loose Setting Powder, she bakes her undereye area. It wasn’t shown in the video but maybe she applied her concealer beforehand? If you have dark circles, apply your concealer first then follow these steps so your bags stays hidden.
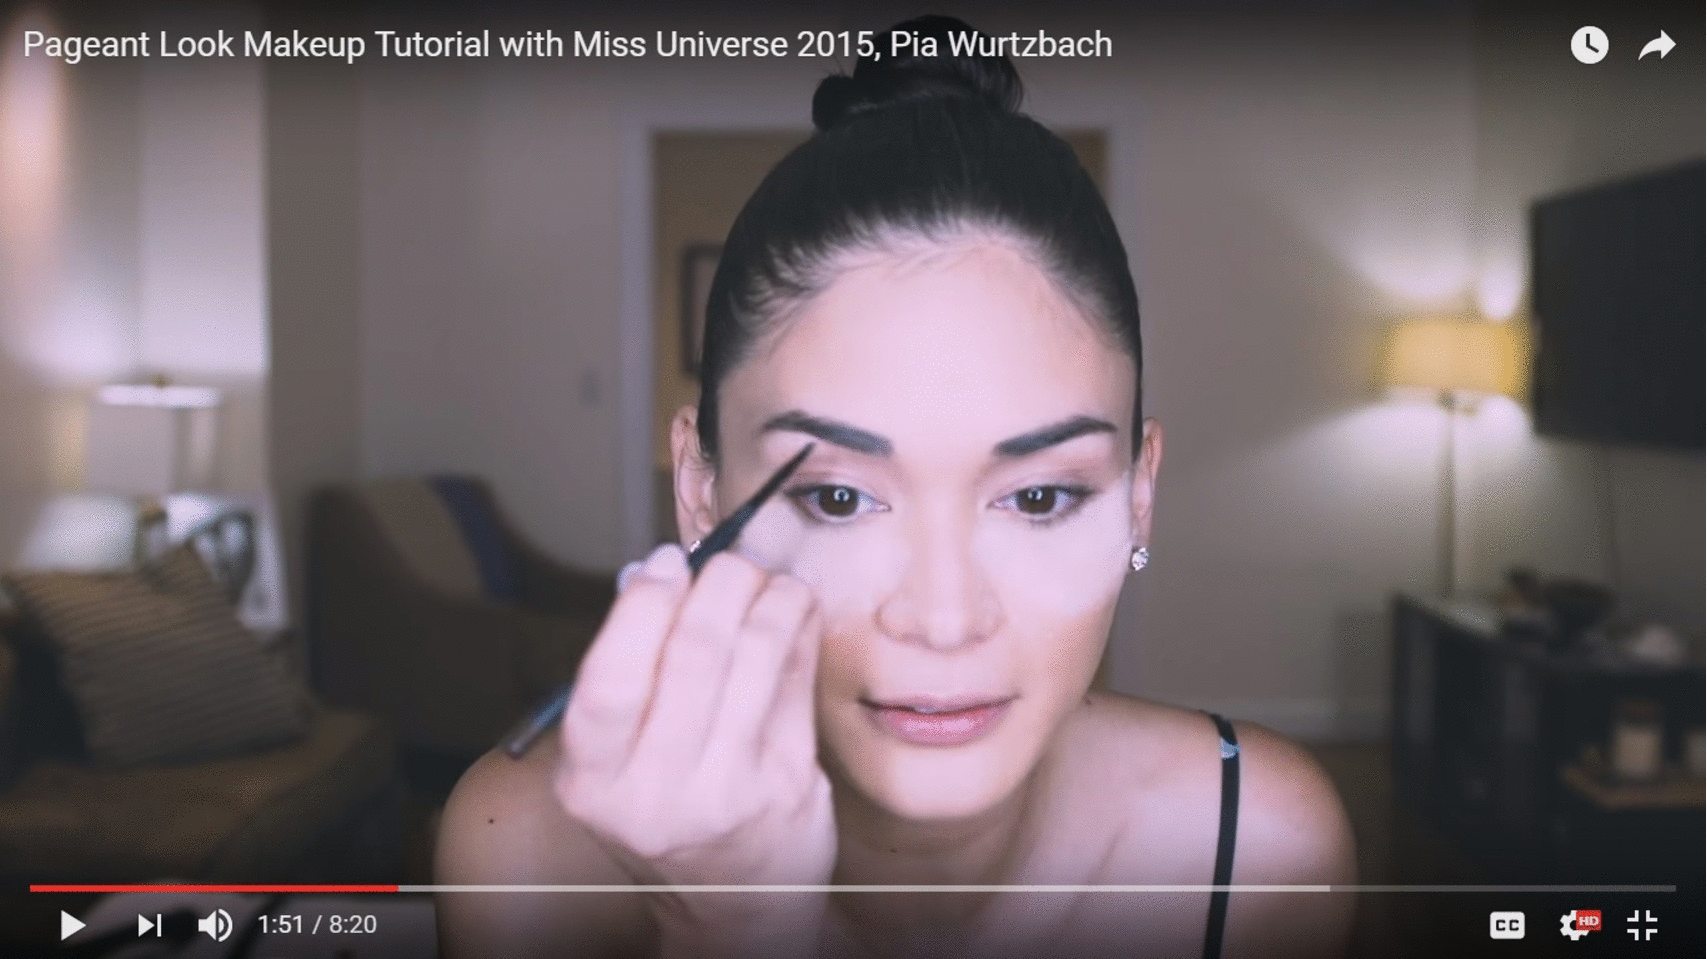
While giving her loose powder ample time to set, she reaches for her MAC Brow Pencils in Spiked (darkest shade), Lingering (medium), and Fling (light). We’re big believers in brow contouring over at PV and her technique is pretty similar. The darkest shade is used to map the bottom and outermost parts of the brows (the tail), where you usually need the most definition. The medium shade is used to outline the top of the brow, and finally, the lightest shade fills in the rest of the brow. This is how you get 3D brows that never looks flat on camera!
With a fluffy blending brush, she softens the edges towards the nose to make the brows look more natural and to produce a contoured effect.

Instead of immediately reaching for a pretty palette, the crafty Miss U grabs a multi-color face powder to do her eye makeup! She uses two colors from the limited edition MAC for Beth Ditto Powder to the People (no longer available): a light brown shade to fill her entire lid and the inner third of her lower lashline, and a dark brown one to contour her socket line and the rest of her lower lashline.

For extra definition, she takes the Laura Mercier Eye Art Artist’s Palette and uses Truffle (a matte medium brown) to deepen the socket line contour and Violet Ink (matte purple) on the place where the socket line meets the outer corner of the eye. She uses same colors to go over her lower lashline again.
We're surprised to discover that Pia never uses black eyeshadow - she says she goes for browns and violets for her smoky eyes, but never straight up black. To get intensity, she just adds more of the color! This is interesting because now that she mentions it, black is too harsh in person and even often in camera. It doesn't register well. Pia says she also goes for warm shades, which we totally agree with as warm eyeshadow looks fantastic on Filipina skin.

If your powder products are prone to a bit of fallout, the loose powder used for baking will help you keep the area clean. Afterwards, just dust it off with a clean fluffy brush or fan brush.
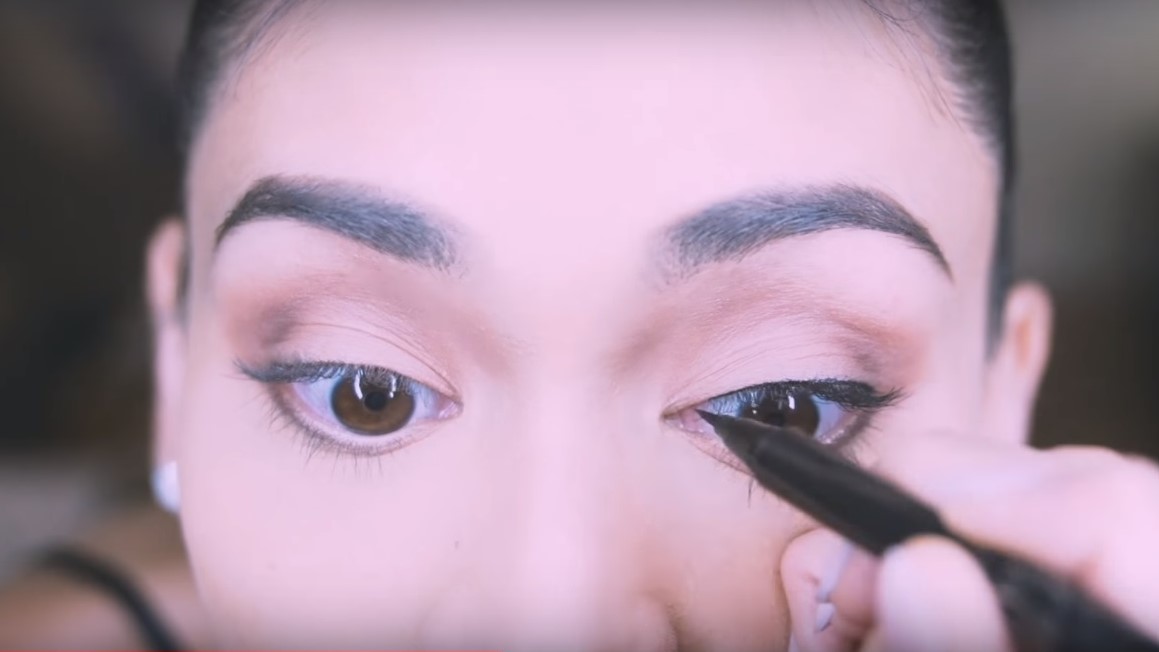
To line her peepers, Pia starts with a waterproof pencil liner to do some waterlining then creates a more intense stroke with a felt-tip liquid liner to tightline. She applies both as thinly and as close to her lashes as possible. Bonus: the pencil makes it easier for you to trace over with the liquid liner!
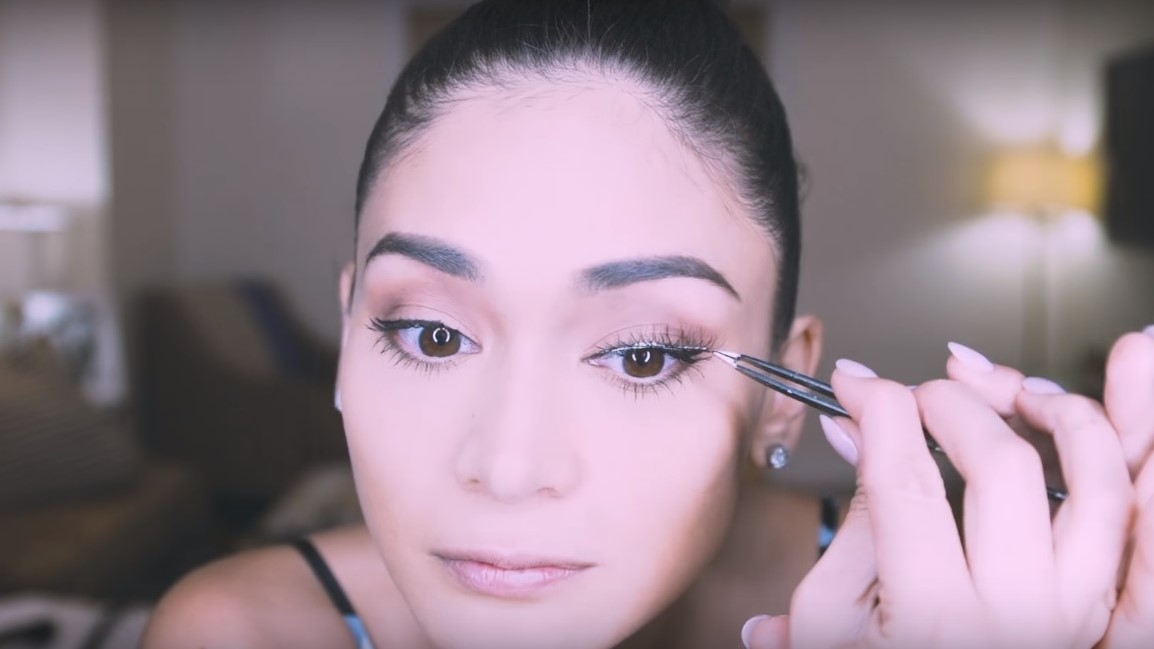
In preparation for a lash-stravaganza, lashes are curled and a coat of MAC Haute & Naughty Lash is applied at both the top and bottom lashes. With tweezers, Pia carefully applies false lashes as close to the lashline as possible. Beauty queen pro tip: opt to stack two or more thin falsies on top of each other rather than using thick falsies that look obviously plastic. Also, make sure that they won’t fall off even if you end up crying!

Remember: like products layer better when used together! To prep for powder contour, Pia gives her base another once over with a few light swipes of Laura Mercier Smooth Finish Foundation Powder using a fluffy brush.

Instead of a contour powder, she applies MAC Studio Fix Powder Plus Foundation slightly above her cheekbones to bring out the angles of her face. A little bit is also applied to her forehead and jawline.

Then it’s time to warm the cheeks with some MAC Powder Blush in Harmony! She applies it right above the contour. Beauty queen pro tip: stick to applying blush to the cheekbones (near the hairline) for a flush that looks flattering even under bright lights and in photos.
Even heavy makeup can look fresh and glowing, with a bit of help from a favorite highlighter! With her fingers, Pia pats on the Becca Shimmering Skin Perfector Liquid in Opal on her T-zone and top of the cheek bones. She also uses a shimmer eye pencil to highlight the inner corners of the eyes.
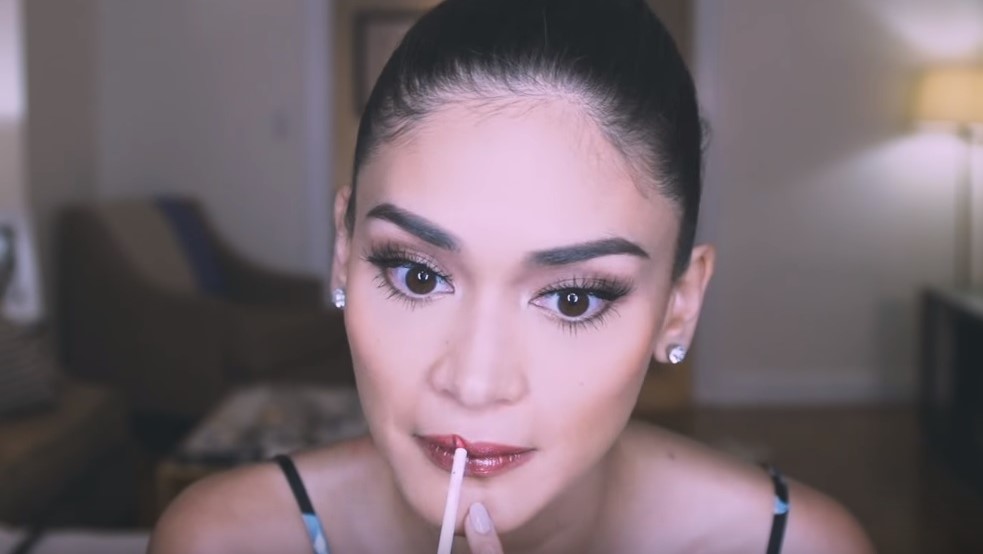
Queens need lip colors that won’t fail their mega-watt smiles, so Pia prolongs her lip color by first lining and filling her lips with the MAC Lip Pencil in Soar. For that extra sparkle, she tops her lip with the Dior Addict Ultra Gloss in 686 Fancy, which she calls a “Miss Universe Pink”.
Now let your hair down and put on your crown!
